
Timelapse with ffmpeg and a raspicam
Saturday, September 12 2020 · Lesezeit: 3 Minuten · 546 Wörter Achtung! Dieser Artikel ist älter als ein Jahr. Der Inhalt ist möglicherweise nicht mehr aktuell!Our barn needed a new roof. My aunt came to me and requested a timelapse of it. In total I had 4 weeks to prepare everything. And of course I did nothing until the weekend before the working crew was expected. And of course something went wrong. I grabbed the wrong Raspberry Pi camera from my home. In case you don’t know: There are two versions: One with an IR filter and one without. I own both versions and you can’t tell them apart by just looking at them. And of course I took the NoIR one. I noticed it on saturday evening so there was no chance to order a replacement in time. So please excuse the pink color tone.
Anyways here is the plan:
- Take a picture every minute
- Upload the images every five minutes to my home server and delete them locally
What you need:
- Raspberry Pi Zero W
- Raspberry Pi camera
- Camera adapter cable
- 3D printer
Creating the case
I used Fusion 360 to design the case. I came up with this:
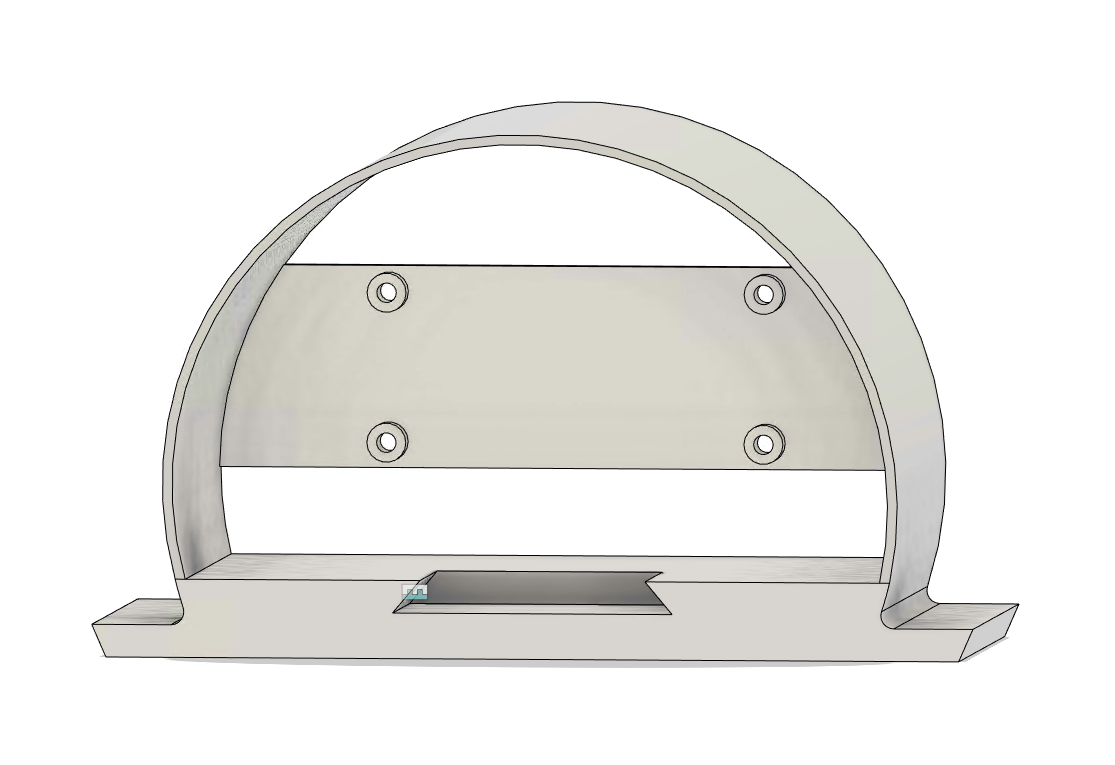
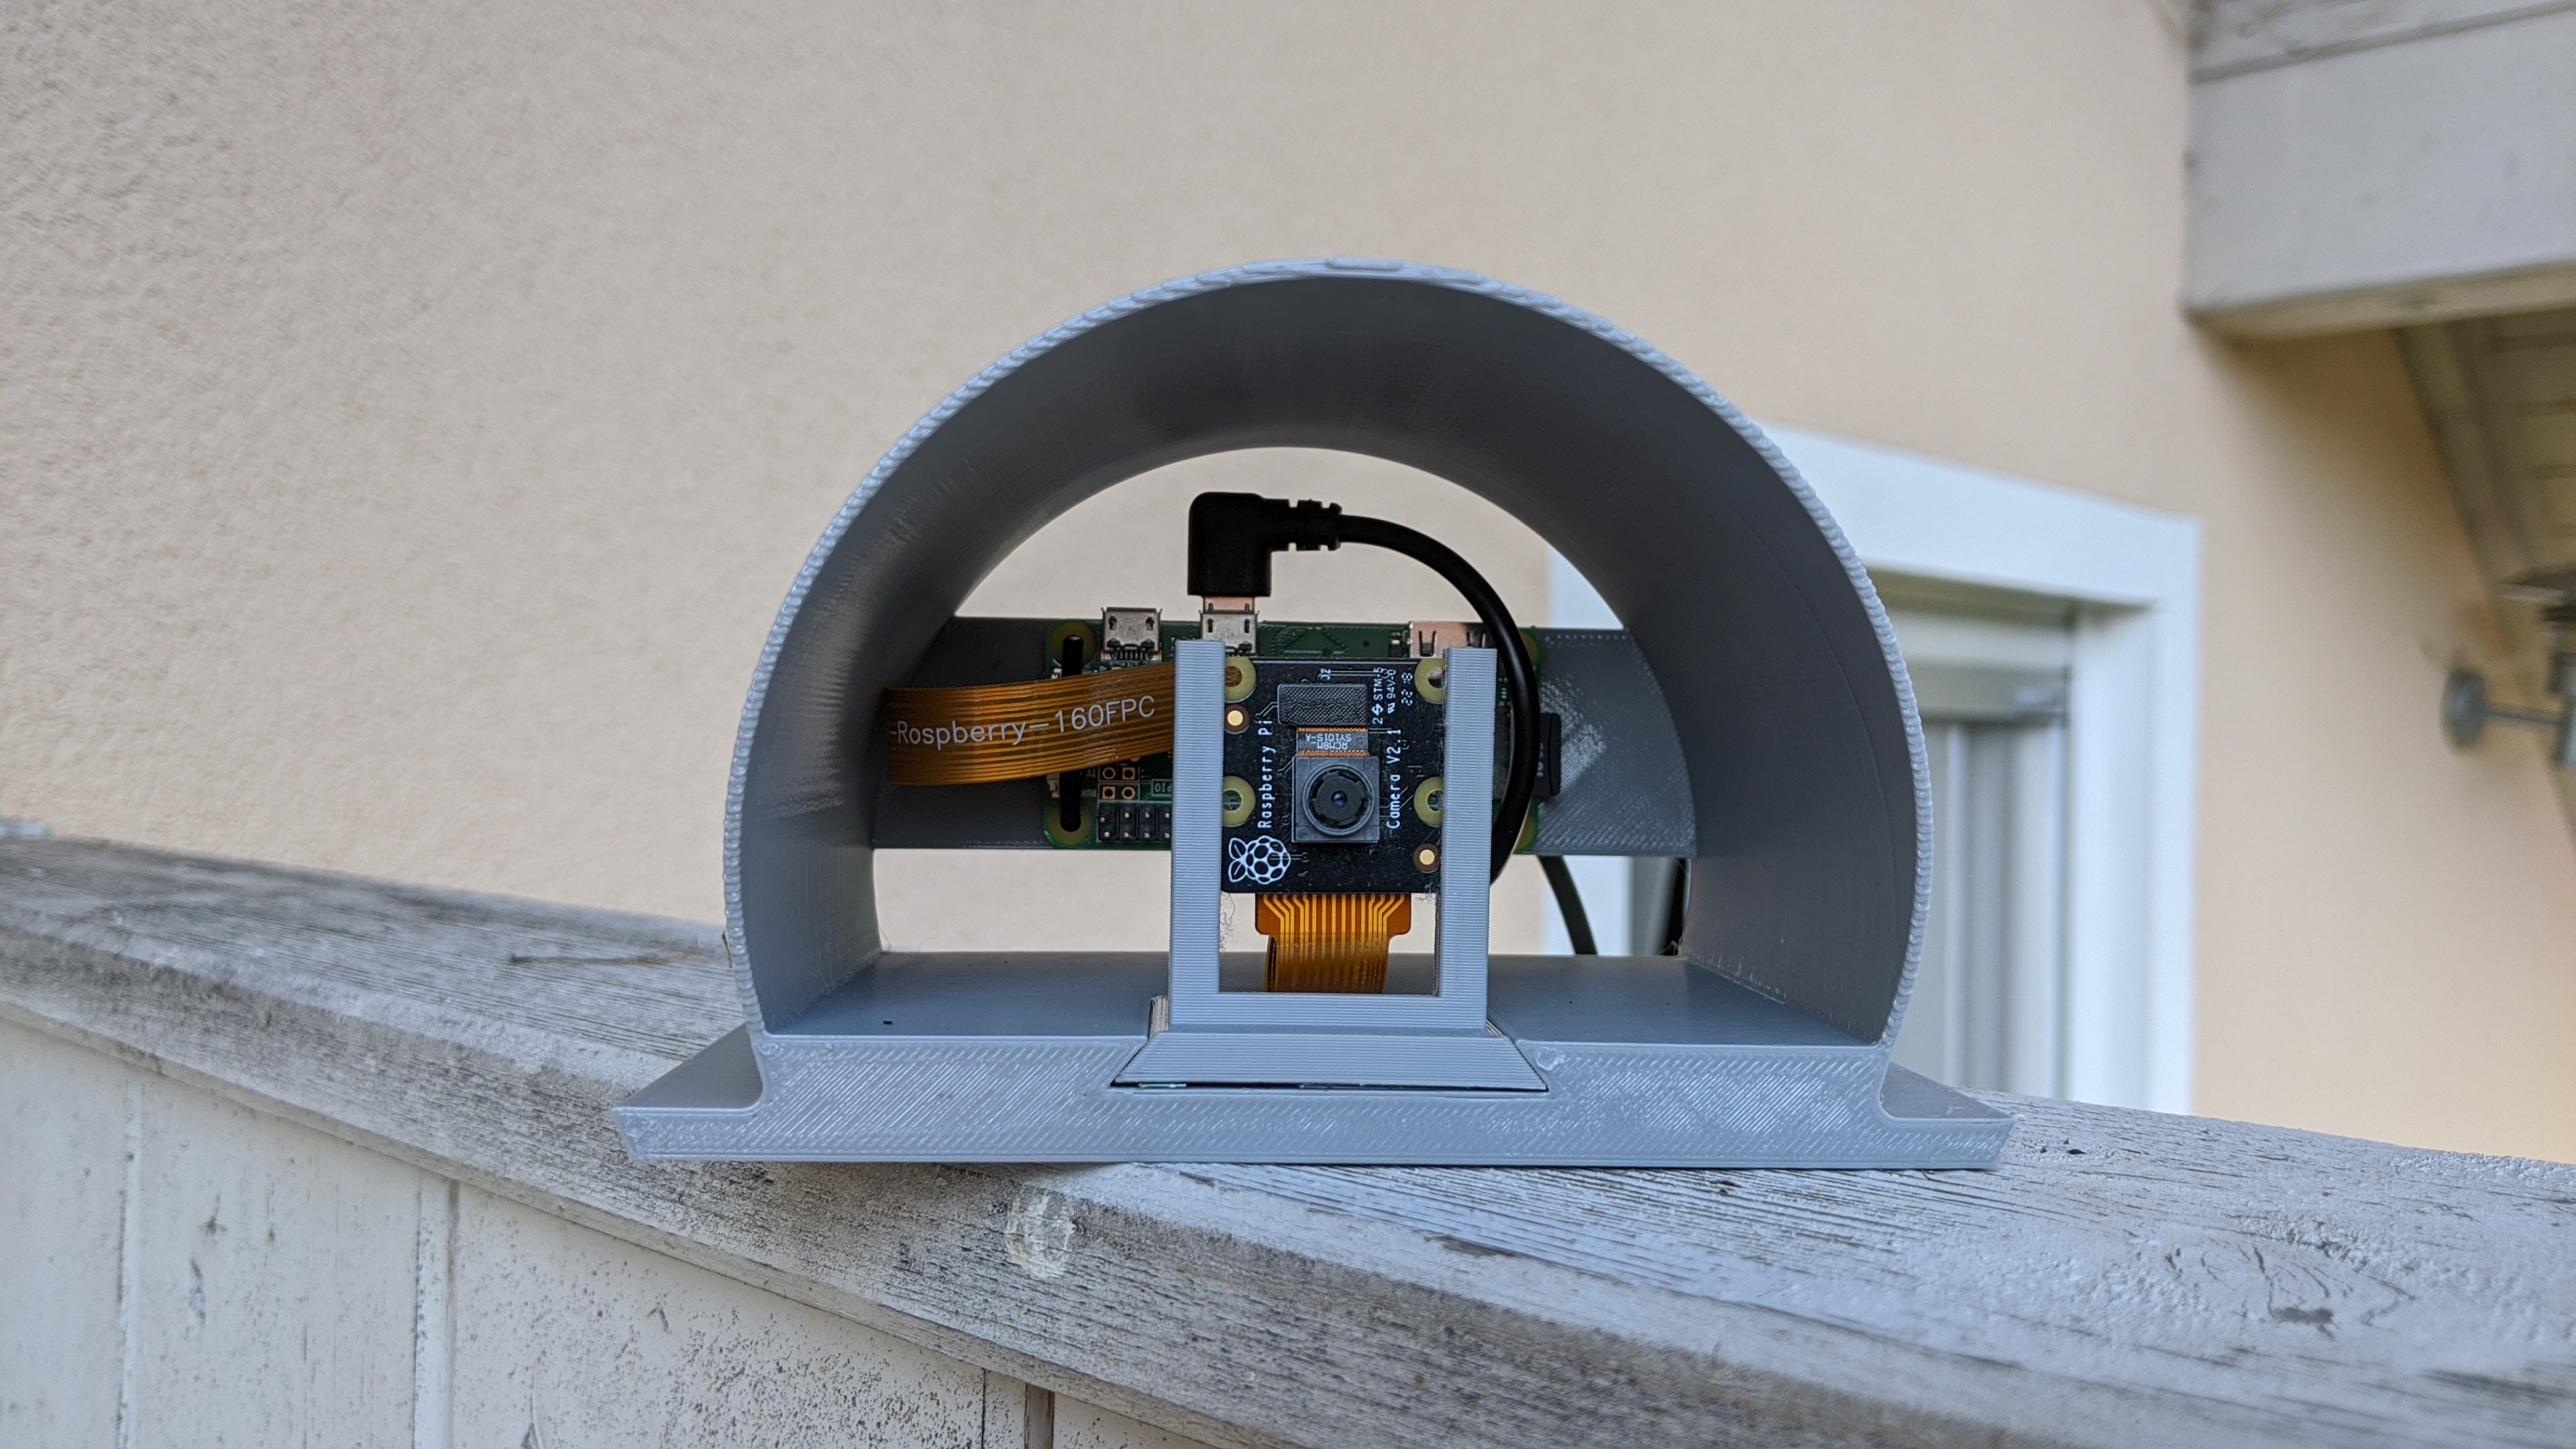
In the back the Pi Zero W would be mounted. There are openings in the top so you can easily insert the power cable. Possible water can leave the case over to bottom cutout without touching any electronics. Mount the Pi with already attached camera cable and power connector facing upwards. See upcoming images for more details.
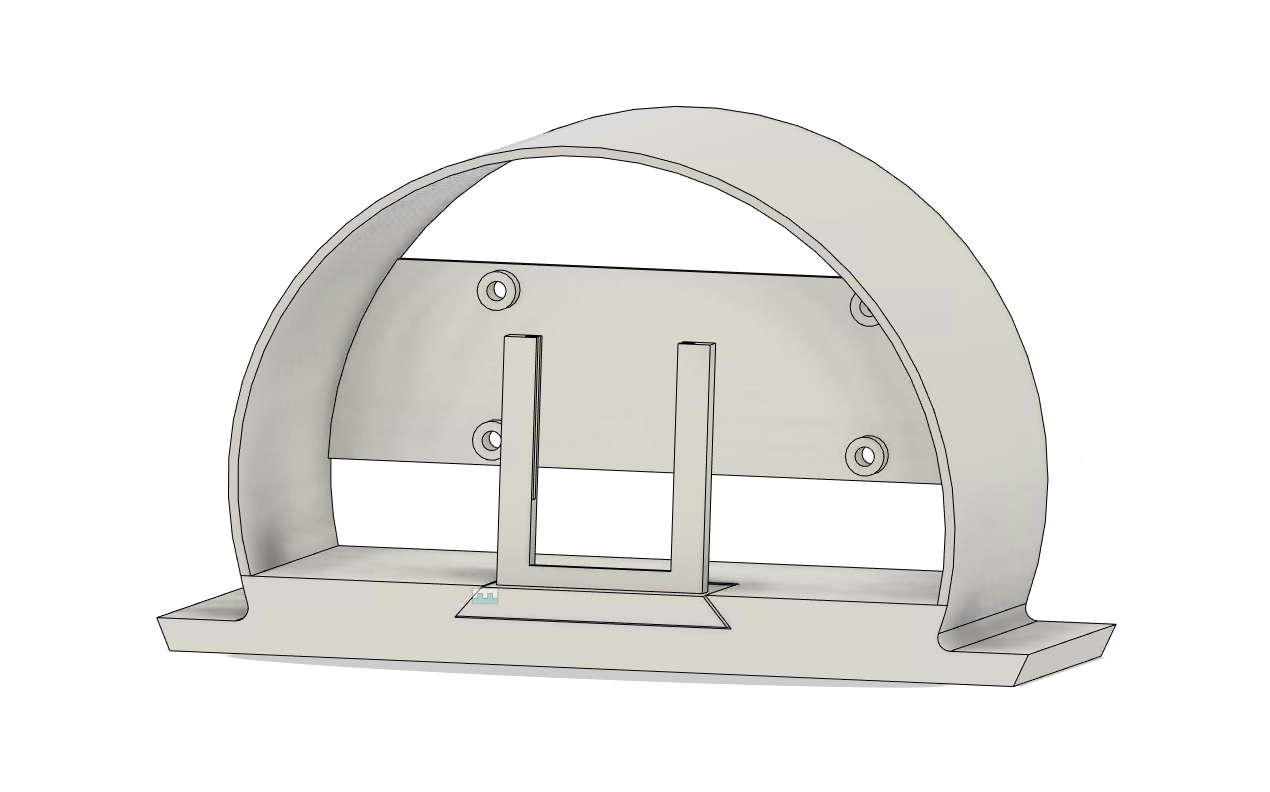
Attach the camera cable to the camera itself and place the camera into the holder. You can slide the camera holder into the case and shim it so it stays in place.
The rails on the side is for mounting. You can drill holes as you need into it and fix it to something steady. In my case I mounted it on my balcony. My end results looks like this:
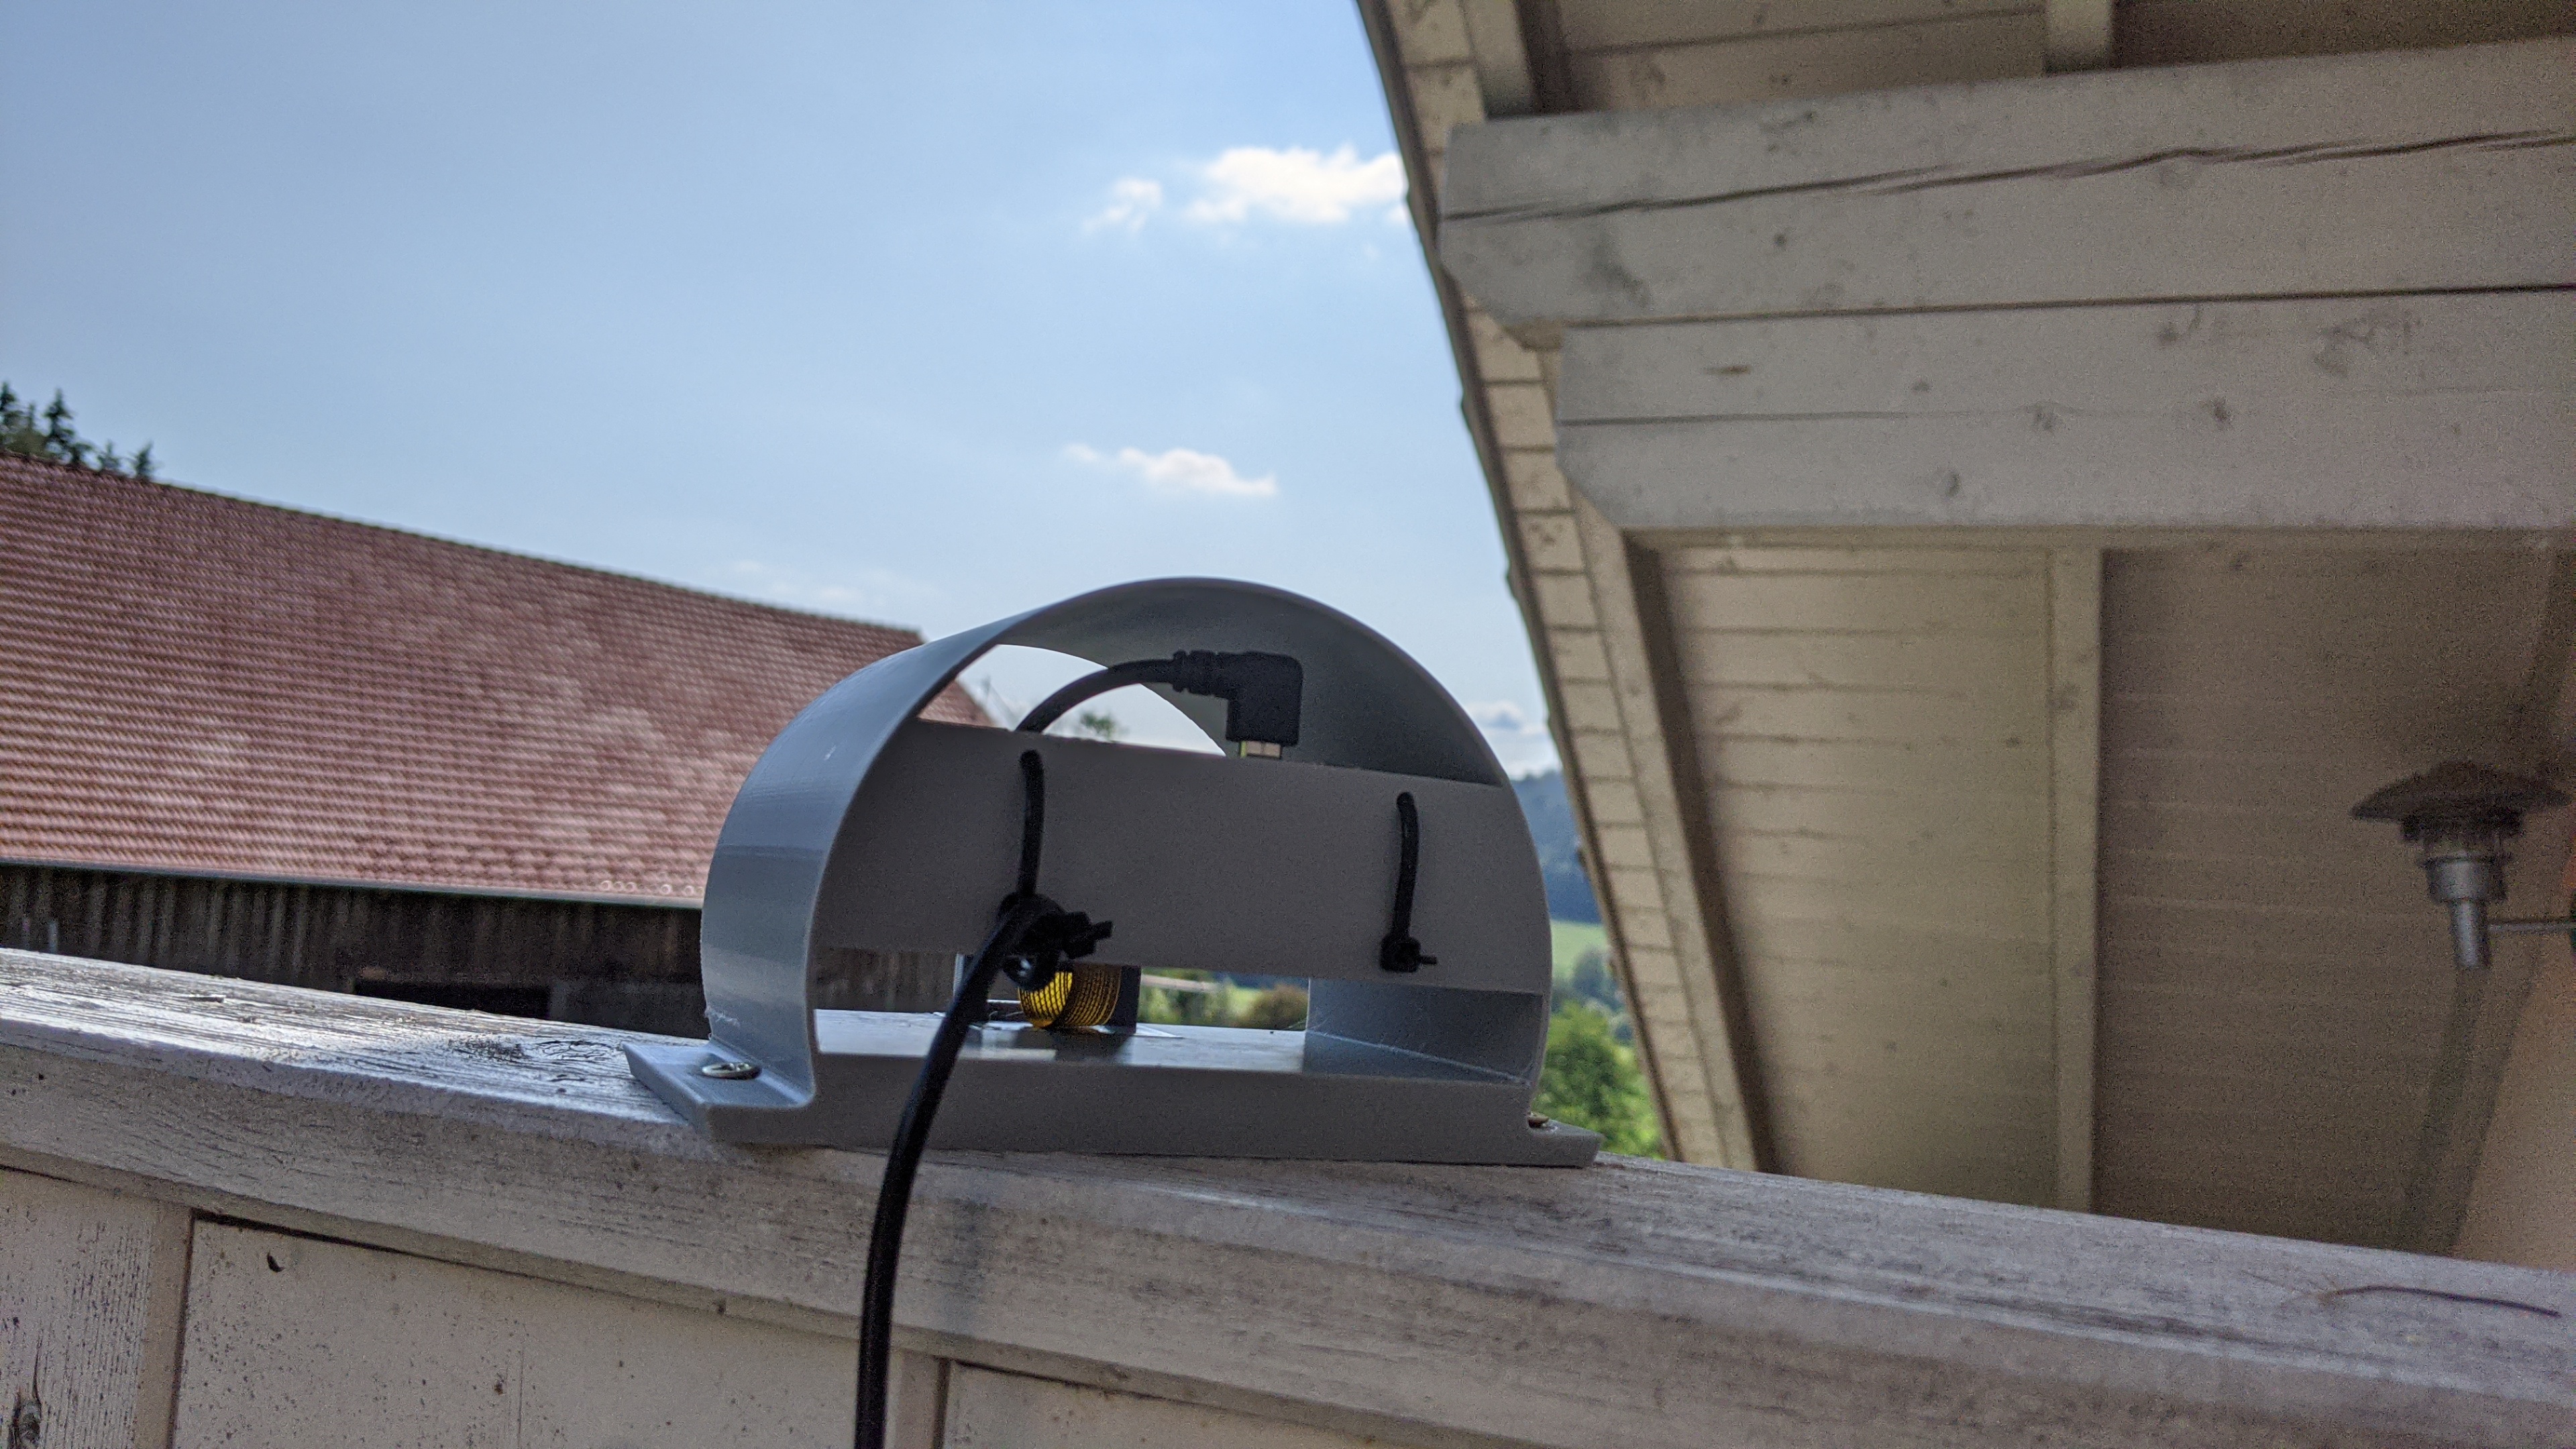
Yes I used zip ties because I also forgot the proper screws. Here are the STL files for 3D printing:
Print the case from the back up. No supports needed. I’ve used PETG.
Programming
I used a standard Raspbian image. I prepared it with my ssh keys and the wifi password. The actual work is done by two cronjobs:
- Take a picture every minute:
*/1 * * * * /home/pi/takepic.sh - Upload the stored pictures every five minutes and delete the source:
rsync --remove-source-files /home/pi/tosend/* veloc1ty@myhomeserverurl:/my/path
The content of takepic.sh is pretty simple:
#!/bin/bash

PHOTOFILE="`date +"%Y-%m-%d-%H-%M"`.jpg"

echo $PHOTOFILE

/usr/bin/raspistill -ex auto -awb greyworld -o /home/pi/currentpic/$PHOTOFILE
mv /home/pi/currentpic/$PHOTOFILE /home/pi/tosend/$PHOTOFILE
Note: I used -awb greyworld because I used the NoIR camera. With the regular raspi cam you don’t need it!
That’s already it for programming.
Creating the timelapse with ffmpeg
First of all create a copy of your raw data! Then you can remove all empty files:
find . -type f -empty -delete
In my case one image was somehow broken. An empty or broken file will quit ffmpeg. So be carefull here.
Now let ffmpeg generate the timelapse:
ffmpeg -r 24 -pattern_type glob -i '*.jpg' -s hd1080 -vcodec libx264 /home/veloc1ty/timelapse.mp4
This will take some time depending on the amount of files. After it’s ready you can edit the video file. For example you could remove the nights or boring parts. My result looks like this (link to YouTube) (🖇️ 🔐) .
Du hast einen Kommentar, einen Wunsch oder eine Verbesserung? Schreib mir doch eine E-Mail! Die Infos dazu stehen hier.
🖇️ = Link zu anderer Webseite
🔐 = Webseite nutzt HTTPS (verschlüsselter Transportweg) Zurück